Introduction
Service-to-Service (S2S) authentication is suited for scenarios where integrations are required to run without any user interaction. OAuth delegate flows, like authorization code, implicit grant flow and resource owner password credentials can be configured to require multifactor authentication (MFA). This configuration prevents integration from running unattended, because MFA is required to acquire the access token from Azure Active Directory. S2S authentication uses the Client Credentials OAuth 2.0 Flow. This flow enables you to access resources by using the identity of an application.
This authentication flow is supported as of R2109 (BC 18.3) and will be the prefered authentication for all API access. See default MS documentation Service-To-Service Authentication for more background information.
For all scenario's in which you need a non-interactive user account to access Business Central (eg. API's). Within buiness central the Azure Active Directory Application page was introduced. This will be used to configure a non-interactive user account. Behind the scenes, it creates a new record in the user table with license type = Application.
Permissions and limitations
In the AAD Application card, you can set up the permissions for this application user. Try to limit the permissions to the very minimum that is required by the external application to perform his tasks. It is not possible to assign SUPER permissions to an application account. The application account will also not be able to start a background process. These are two limitations that make sense considering the role of the external user that is supposed to connect to Business Central using this application account
How to setup - Service to Service
The process consist of three steps:
- Register the external application in Azure Active Directory
- Create the external application account in Business Central
- Grant consent
- Test connection
Step 1 - Register the external application in Azure Active Directory
Business Central uses Azure AD for Identity and Access Management. This means that users accessing Business Central are stored and managed in Azure AD. If an external application needs to access Business Central, it also needs its own identity. When you register your application with Azure AD, you’re creating an identity configuration for your application that allows it to integrate with Azure AD.
See How to register the external application in Azure Active Directory for detailed steps.
Step 2 - Create the external application account in Business Central
There are two ways to create the external application account in Business Central: manually or automatically from code. In both cases, the app needs to be granted consent manually, but the option to create the record from code is of course much more convenient for end-users. Let’s first see how to manually create the application account.
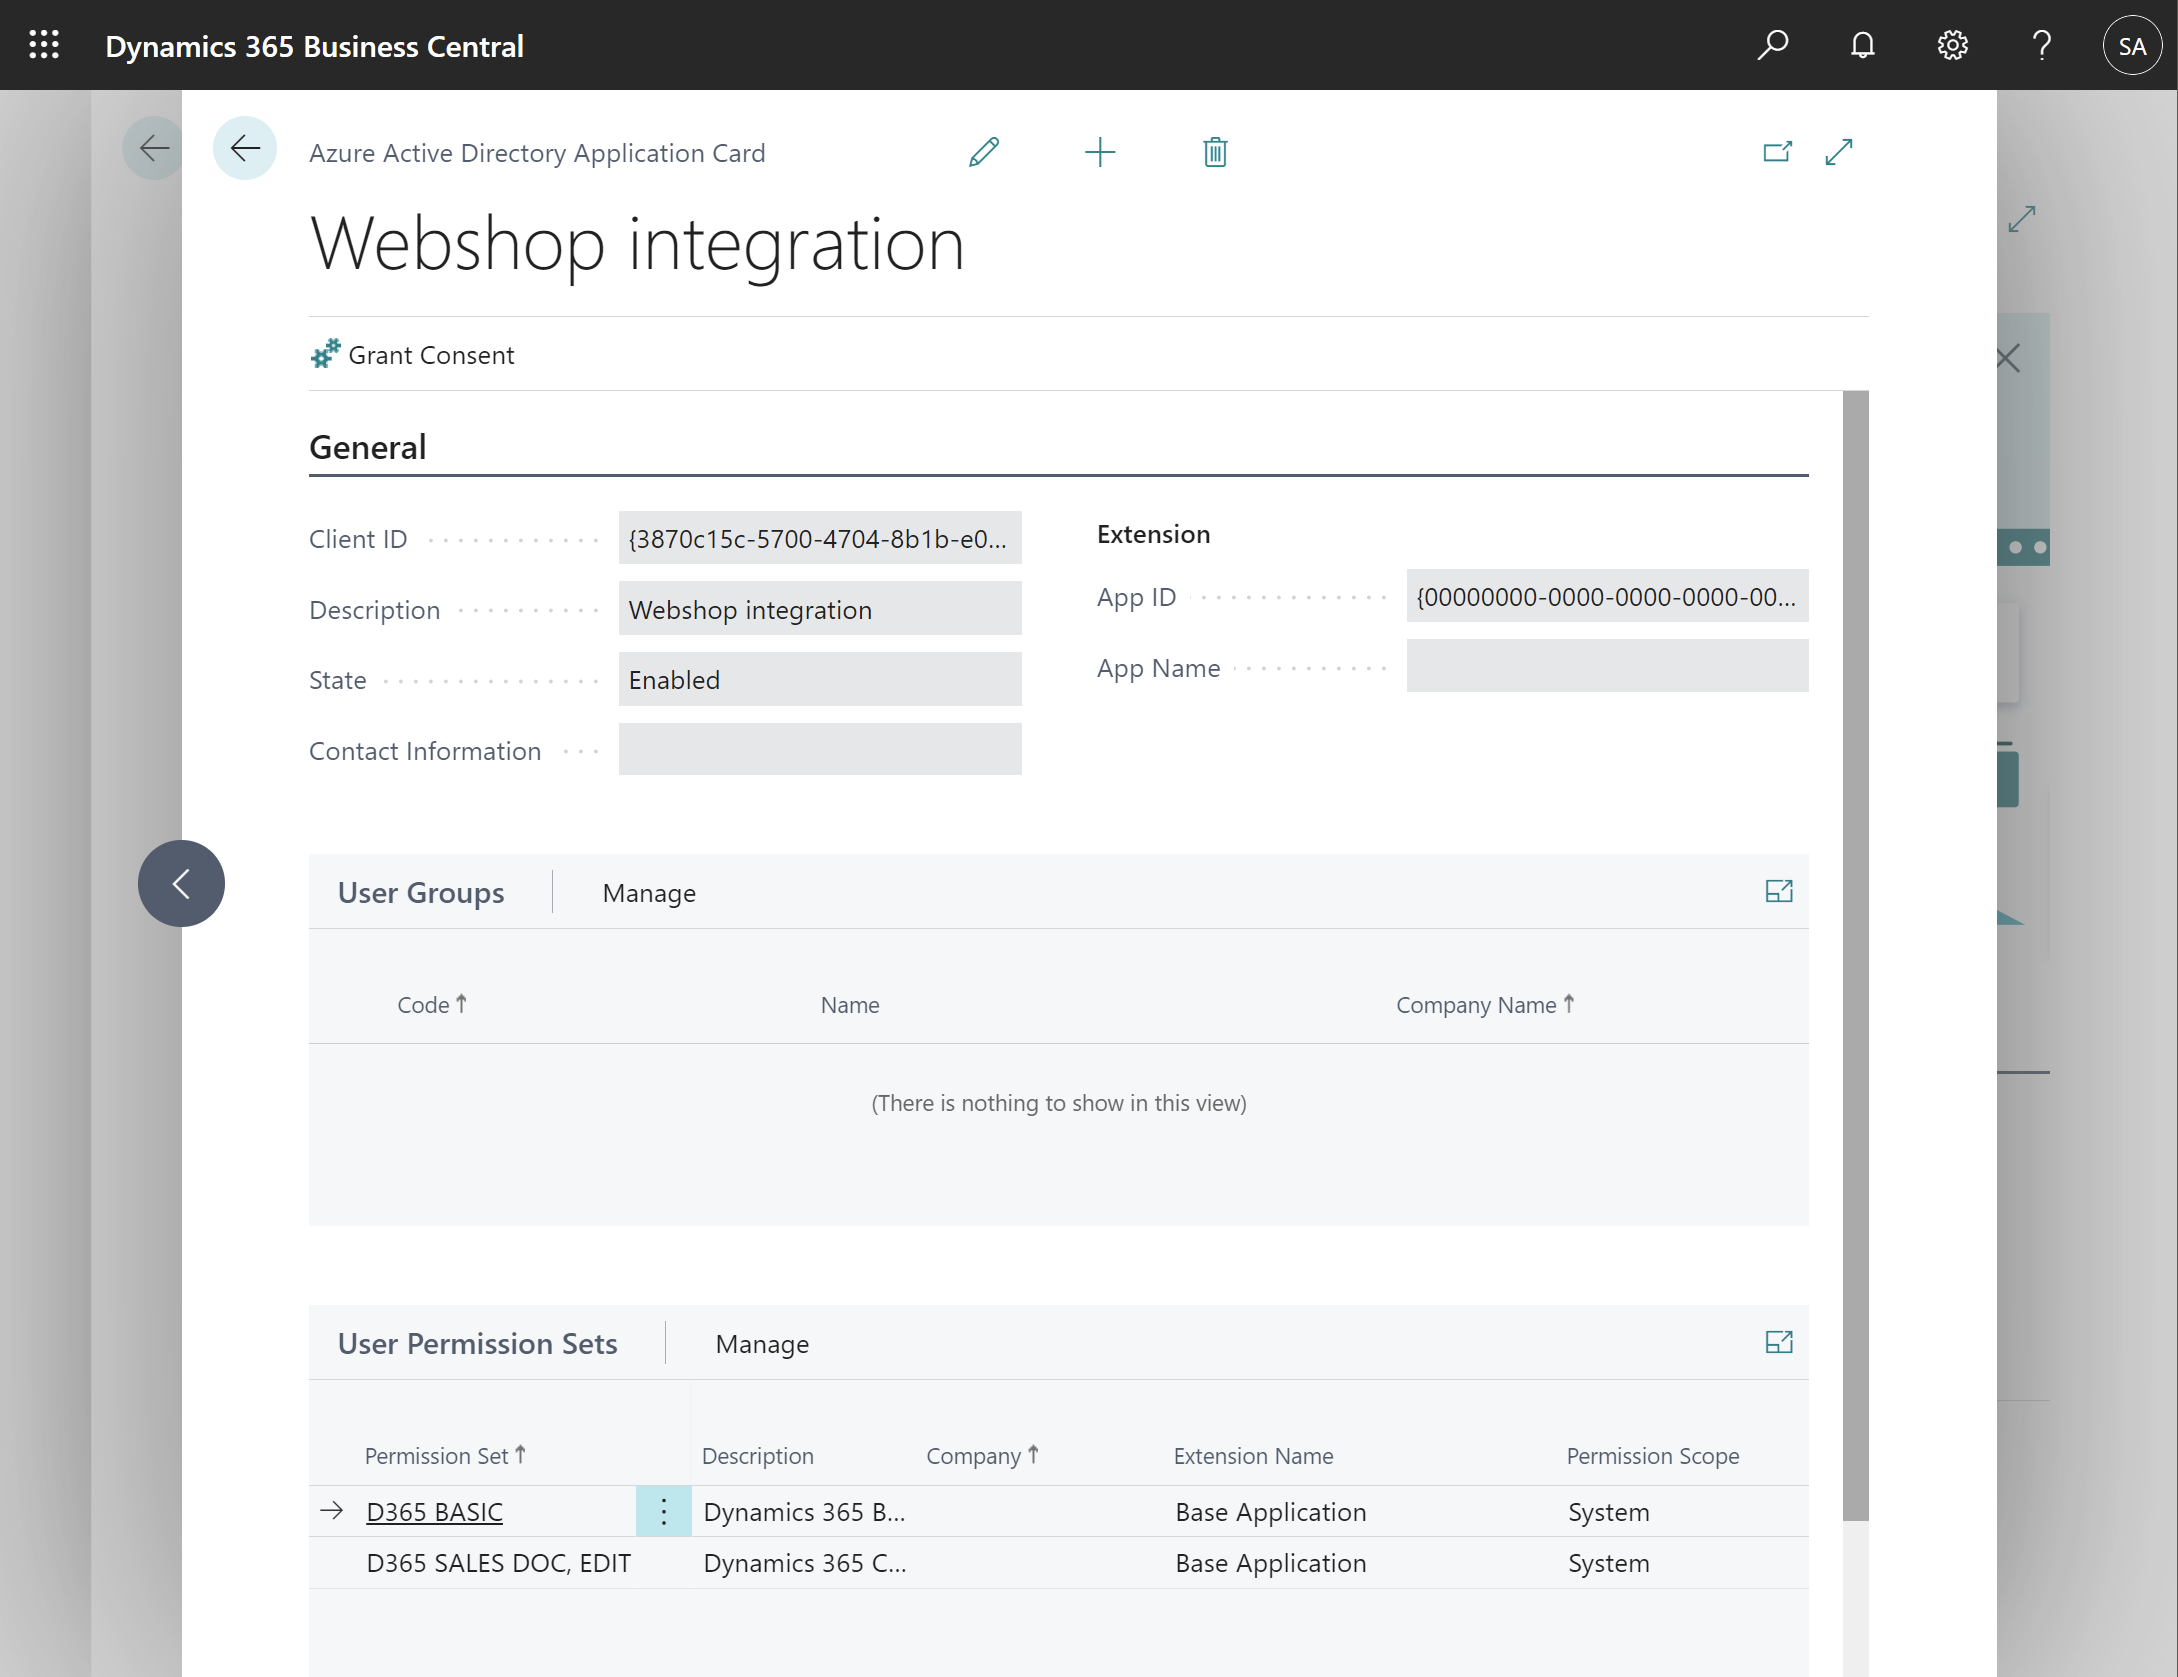
Manually create the Azure Active Directory Application account In Business Central search for Azure Active Directory Applications (or just AAD) and open the page. Click on New to add a new record. Fill in the Client Id of the Azure App registration which you created yourself or was received from the organization that owns the external application.
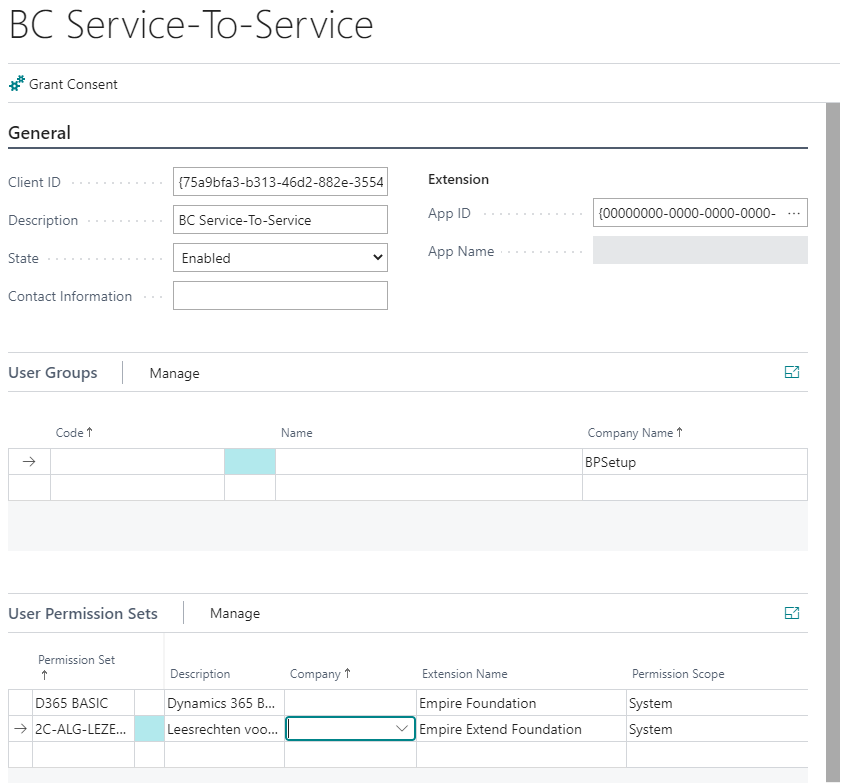
On this card page, we can also configure the permissions. These permissions will be applied to all API sessions of the application account. In the example below the external application is assigned the permission set D365 BASIC and 2C-ALG-LEZEN-ALLEN.
Step 3 - Grant Consent
The web application must be represented in Azure AD by a service principal. The application object created in step 1 is the global representation of the application for use across all tenants, and the service principal is the local representation for use in a specific tenant. The application object serves as the template from which common and default properties are derived for use in creating corresponding service principal objects.
A service principal must be created in each tenant where the application is used, enabling it to establish an identity for sign-in and/or access to Business Central being secured by the tenant. The process is called “grant consent”. This means that we tell Azure AD that the application is allowed to access Business Central, which is then stored as the service principal representing the consented application.
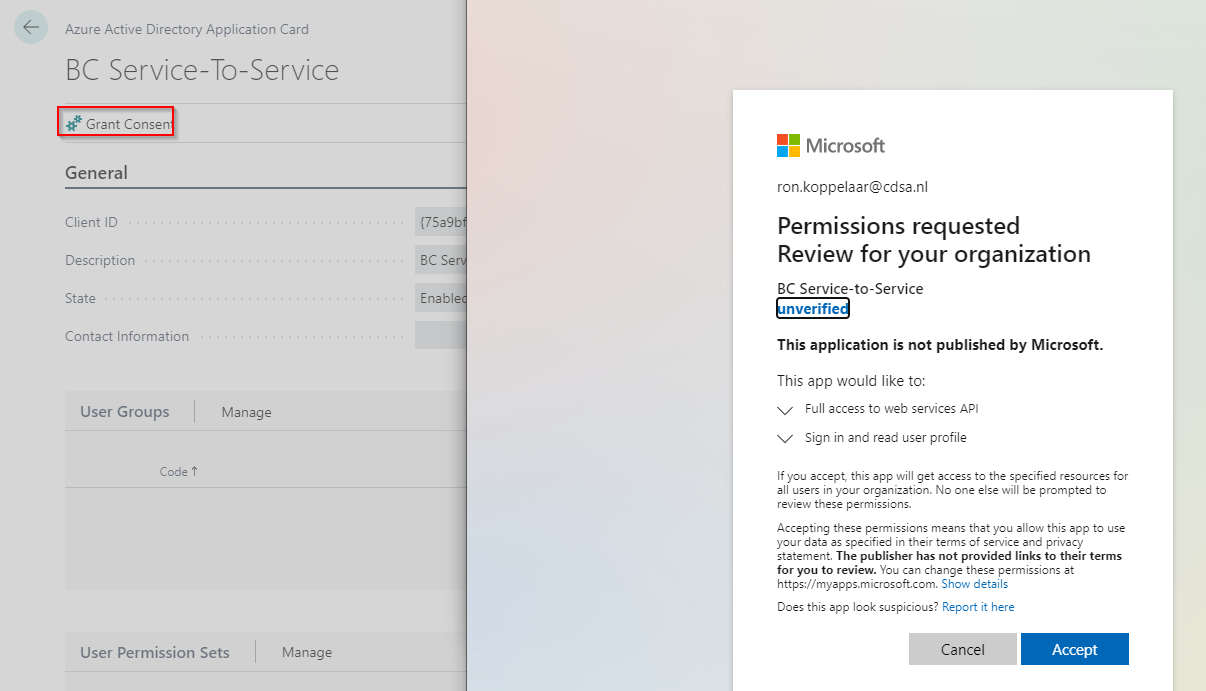
Click on the Grant Consent action at the top in the Azure Active Directory Application card in Business Central. It will open a popup page that requires you to log in. The user that gives consent needs to be a Global Administrator, an Application Administrator, or a Cloud Application Administrator. If you don’t have that role, then let a user who has the required role log in here. This is only needed in this step of the registration process. After logging in you will get a page that asks to accept the permission requested by the application.
Please note the word unverified in the screenshot below, under the name of the application. That is because I didn’t associate an MPN account with the Azure app registration. It’s highly recommended to associate the MPN account of your organization under Branding in the Azure app registration to get your company displayed.
Step 4 - Test API connection
To test the API connection using the Client Credential flow below powershell scripts can be used. Before we dive into the code, it’s important to understand the key parameters and their values.
| Parameter | Value |
|---|---|
| Client ID | The Application (client) ID that was assigned during the app registration in Azure AD. If you didn’t copy it, then you can always find it in the app overview in the Azure Portal. |
| Secret | The secret that was created during the app registration in Azure AD. If you didn’t copy it, then you need to create another one because you can’t see the previously created secret. |
| Scope | https://deonline.api.bc.dynamics.com/.default This points to the permission that you selected during registration: API.ReadWrite.All or Automation.ReadWrite.All |
| Tenant ID | The tenant id is the GUID or domain name of the Azure AD of the Business Central environment that the application wants to call. It's the Azure AD in which the service principal was created when the application was granted consent. See also the previous blog post for more info about this. It’s possible to use a GUID or to use the primary domain name of the Azure AD |
| Environment | The name of the Business Central environment that the application wants to access, e.g. Production, Sandbox, etc. This is not a parameter for getting the OAuth access token, but it must be part of the API url |
$clientid     = "75a9bfa3-b313-46d2-882e-35542644ce5b"
$clientsecret = "uf.yQ8inpj_V_5yBlBshIcg5.8b.Z0KMi9"
$scope        = "https://api.businesscentral.dynamics.com/.default"
$tenant       = "cdsa.nl"
$environment  = "sandbox"
$baseurl      = "https://deonline.api.bc.dynamics.com/v2.0/cdsa.nl/$environment/api"

# Get access token
$body = @{grant_type="client_credentials";scope=$scope;client_id=$ClientID;client_secret=$ClientSecret}
$oauth = Invoke-RestMethod -Method Post -Uri $("https://login.microsoftonline.com/$tenant/oauth2/v2.0/token") -Body $body

# Get companies
$companies = Invoke-RestMethod `
             -Method Get `
             -Uri $("$baseurl/api/v2.0/companies") `
             -Headers @{Authorization='Bearer ' + $oauth.access_token}

$companyid = $companies.value[0].id

# Get customers
$customers = Invoke-RestMethod `
             -Method Get `
             -Uri $("$baseurl/api/v2.0/companies($companyid)/customers") `
             -Headers @{Authorization='Bearer ' + $oauth.access_token}